Remember
this fun project? I promised a tutorial
on making the holder so here it is. This
is such a simple project and makes an amazing gift.
Here
are the supplies you need:
12”
x 12” Cardstock
Coordinating
Cardstock for Trim (optional)
1 ½”
x 5 ½” Cardboard
Brad/Embellishment
for Top
Scoring
Tool
Border
Punch/Die (optional)
Hole
Punch (optional)
The
easiest way to create this cute holder is to use a piece of double sided
cardstock and score using this template.
I usually
score the two shorter lines first and pre-fold to the inside.
This way I can line up one side and easily
score the remaining two lines 1 ½” apart and fold these to the outside.
Then
you will want to re-open and adhere the cardboard strip in the center between
the score marks.
If
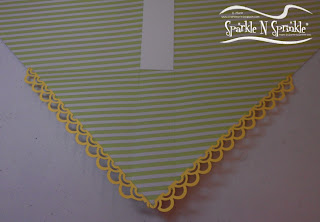
you want to add a border, adhere it on the inside along the edges of the two
triangles.
Now you can fold in both
sides and then fold the opposite sides to the outside.
You
will want to adhere the top corners together.
You can simply tape them together or you can punch a hole through both and
use a brad to add an embellishment. On this holder I taped the top together and
added a flower on each side.
Now
all you have to do is make a set of 5 ½” x 4 ¼” coordinating cards and decorate a small
notepad to tuck in on both sides. It is
also fun to decorate a pen and tuck it in next to the notepad or attach it to
the bottom section between the two sides.
For
the notepad holder I shared in the blog hop, I used a solid green piece of
cardstock for the holder base. Then I
used coordinating decorative paper to cover the triangular sections on both
sides. For
the top I used Double Sided "Tear-ific Tape" to adhere the two top
corners together and added my strawberry image on both sides.
This
makes a great gift and you can use it to tuck other things in the sides besides
cards and a notepad. Try using a winter
theme and tucking in hot chocolate packages (you can even decorate the
packages).
How about making a mini
holder and tucking in tea bags?
Here
is my version with a tea bag – I couldn’t resist trying this with a 7” square
of cardstock. The tea cup and sentiments are from Sparkle N Sprinkle's Zendoodle Tea set.
Have
fun!!
E. Marie
This
Tea Bag Holder is entered in the following challenges:
Bunny Zoe's Crafts April Challenge #35 –
Favorite Color Challenge (I love soft blues and pinks)
Charisma Cardz Challenge #14 – Tags
Crafty Creations Challenge #217 -- No Squares
FlourishesTimeless Tuesday #215 (FTTC215) – Around The House (Tea Bag)
One Stop Craft Color Challenge #224 - Pastels
The Pink Elephant Challenge TPE194 – "Use SPRING Colors"
Sentimental Sundays Challenge #150: Tag You’re It
(plus a sentiment)
Stamp and Create April Challenge: Use at least
1 die cut


12 comments:
Such a lovely job on all of them, Marie!
Thanks for the tutorial. This is a definite keeper! Love the little tea bag one too.
A lovely creation! Thanks for joining in this week at Charisma! xxx
"WOW" Marie, this is so beautiful x
What a cool note holder and a great tutorial! Thanks so much for playing along in the Timeless Tuesday challenge with us this week!
Thanks for the fabulous tutorial, Marie - beautiful samples and the strawberry set is just darling.
Marie, you always come up with the most colorful, beautiful, awesome cards and projects. What a beautiful gift idea! Thank you for the wonderful tutorial, too, and for showing different ideas of what to fill the little goodie holdie with! I may use this for cookies and recipes next Christmas! hugs, de
These are just fabulous, great idea!! Thanks for joining us at Charisma Cardz.
Joanne x
super cute, girlie, and FABBY little gift idea! thanks for sharing this with the Charisma Galz - hope you'll come back and play again soon! :)
Great project and tutorial!
Great tutorial! Thanks for joining us this week at Sentimental Sunday for our "Tag, You're It!" challenge. Good luck and hope you can join us again next week!
Awesome cards!! Thank you so much for entering our challenge over at Bunny Zoe's ♥
Post a Comment